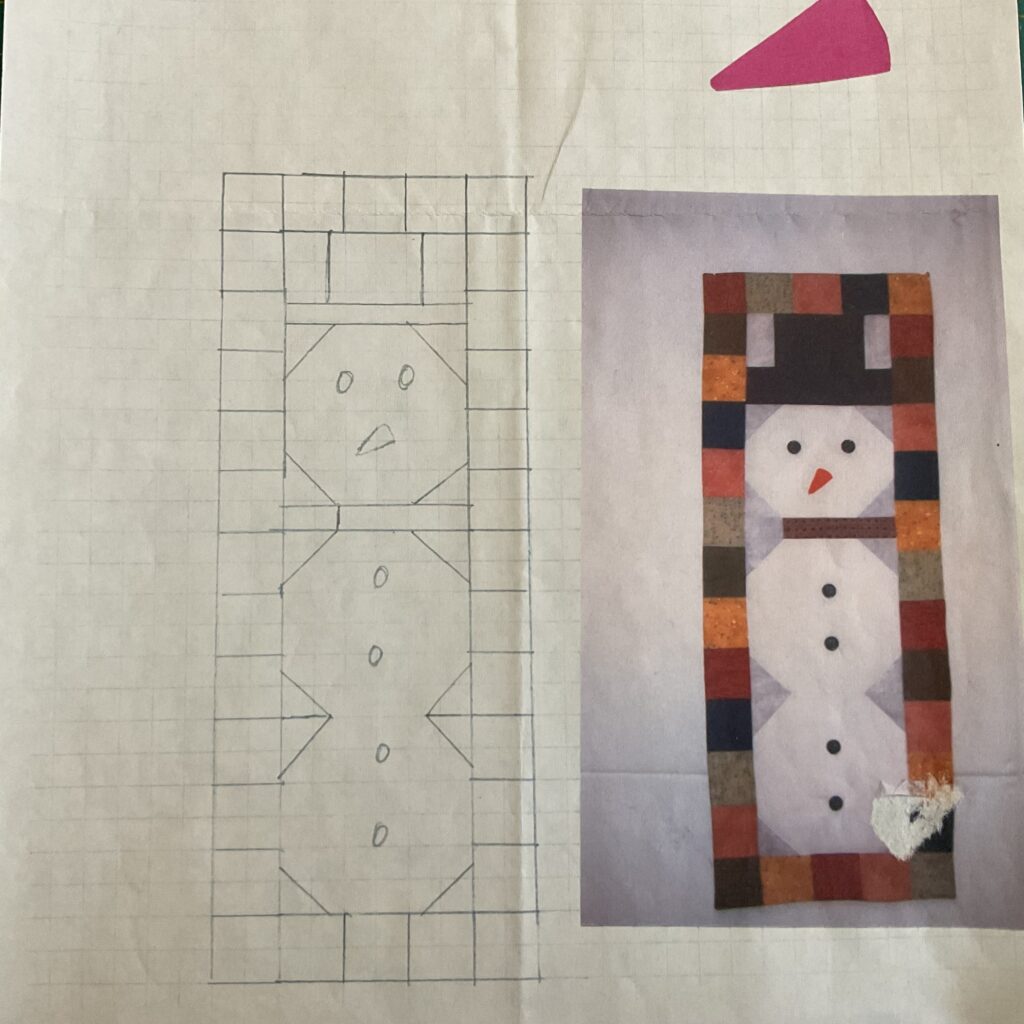
Snowman Wall Hanging
Any questions contact: Linda Stewart lindastew1947@gmail.com
Fabric #1 White – Snowman body
cut 2 – 8 1/2” squares
cut 1 – 6 1/2” x 8 1/2” square
Fabric #2 Gray – Snowman background
cut 12 – 2 1/2” squares
cut 2 – 2” x 3 3/4” rectangles
cut 1 – 1 1/2” x 2 1/2” rectangle
Fabric #3 Black Hat
cut 1 – 3 3/4” x 5 1/4” Square
cut 1 – 1 1/2” x 8 1/4” rectangle
Fabric #4 Plaid – Scarf
cut 1 – 1 1/2” x 6 1/4” rectangle
Assorted Fabrics – Blocks around Snowman
cut 32 – 3” x 3” squares
Orange Felt – Nose
INSTRUCTIONS:
Step 1: Fabric 2 (gray) 2 1/2” squares, draw a diagonal line on the back from corner to corner. Put square right sides together on the fabric 1 blocks and sew on drawned line. Trim within 1/4” from seam and press open. This forms the background for the snowman’s body and head.
Step 2: Sew Fabric 4, (plaid) to Fabric 2 (gray) 1 1/2 x 2 1/2, this forms the scarf.
Step 3: Sew the 2 body squares together, then sew scarf to the top of the body, and sew the head block. This creates the snowman.
Step 4: Sew the Fabric 3 (black) 1 1/2 x 8 1/4 piece on top of the snowman head. Then sew the 2 pieces of gray fabric 2 7/8 x 3 3/4 to the black piece 5 1/4 x 3 3/4 to form the rest of his hat, and then in turn to the black strip on top of the head.
SQUARE UPM THE PIECE TO 8” x 28”
Step 5: Sew the assorted 3” squares together as follows: 3 squares together for the top and 3 squares together for the bottom. Sew the top & bottom squares to the snowman. Do the same for the sides, sew 13 together for each side and sew to the snowman.
Quilt as desired. Sew buttons on for eyes and to the body, add the orange felt for a carrot nose.