Supply list:
Cut:
1 – 10” square scrap fabric, (make sure this is square) – This will be the fabric that you will write on to make your pattern. You will not see it in the completed project. Pick a fabric that you will be able to see the markings that you will make. I use a ballpoint pen to mark my pattern
1 – 10” square backing fabric
1- 10” square batting [I used heat reflective]
1 – 34”x 2” fabric for binding – (Bias is preferred but regular will work)
If you want to complete your trivet in class please prep your prairie points prior to class.
Cut and fold into Prairie Points
5 – 3” squares (leave one square unfolded) Center
8 – 3.5”squares
8 – 4” squares
8 – 4.5” squares
4 x- 5” squares – (do not fold – they will be folded differently)
Prairie Points are: Square folded in half. Take the side raw edges and fold to the bottom raw edge, making a triangle, and press. Here is a short You Tube Video on how to make prairie points. https://www.youtube.com/watch?v=AcpSKBw9FVU&t=54s
Small 6″ Ruler
Pen
Glue stick – Any water based glue stick will work. I buy mine at Dollar Tree, JOT 6 for $1.25
Sewing Machine
90/14 Needles
Thread
Iron
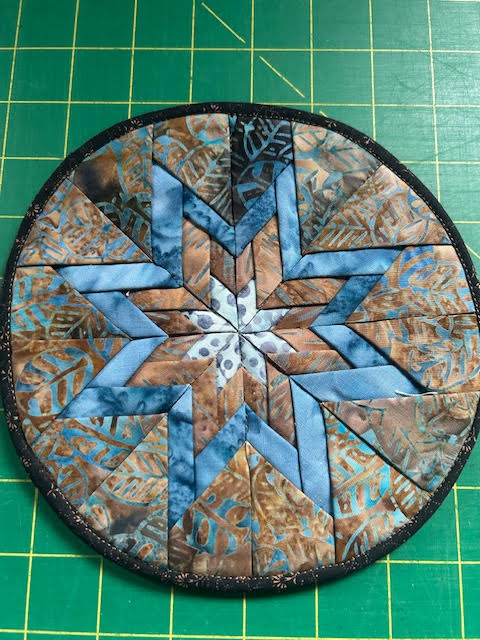
You may choose to make any shape, examples below.
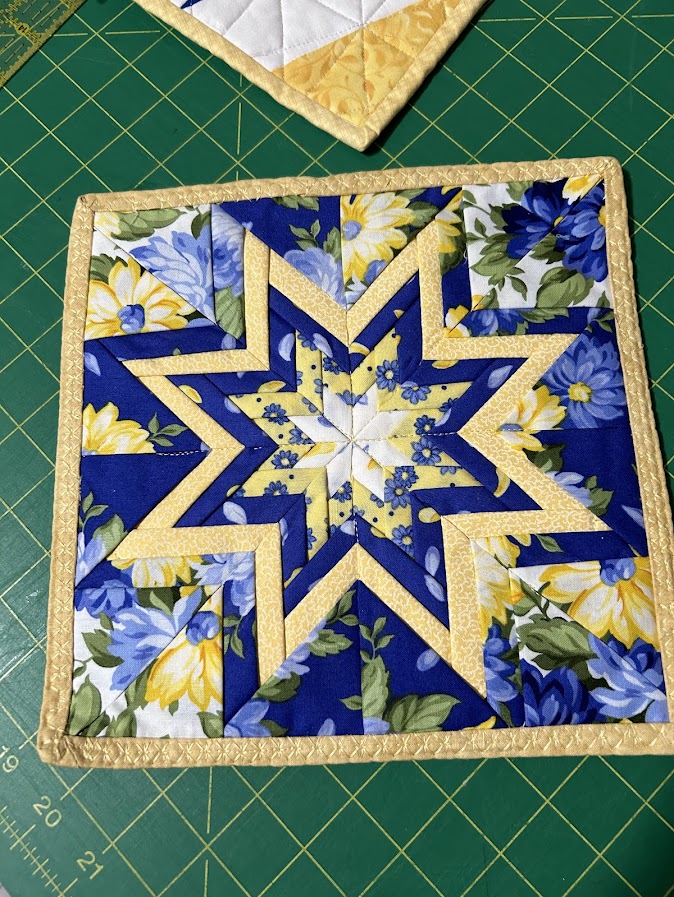

Folded Star Directions:
To make template:
Square scrap 10”
Fold in half horizontally, fold again vertically – to make square – PRESS
Fold, folded edges together – PRESS
OPEN and you should see a star shape with 8 sections.
Mark center with pen.
Measure from center, out each crease 1 ½” draw line approx 1” long.
From first line, measure ¾” and draw a line, repeat 3 times
Do this to every crease (8 times)
To begin:
Unfolded 3” square. Fold and press into quarters. Place in center of template, using the lines you drew to make square, glue in place
Take 4, 3” prairie points and place the points to center on the square. Glue in place. Try not to glue where you will be sewing. (center and bottom edge)
Take 4, 3 ½” prairie points and place directly on top of the previously placed, using the next line that you drew as a guide for the distance apart. Glue in place. Take the next 4 , 3 ½” prairie points and place in the corners using the line as a placement guide.
Repeat the same way with the 4” prairie points and then the 4 ½” prairie points.
If you wish to make a ROUND folded star, stop here and read the sewing directions. After sewing you would find a round plate approx 7.5” and trace a circle and cut off excess.
If you wish to make a HEXAGON folded star stop here and read the sewing directions. After sewing you would cut around the edges as it is now.
To make the SQUARE. Take your 4, 5” squares and fold in half diagonally, press, then fold the raw edges toward the raw edge making a diamond shape. (Pressed edge is in center)
Place the folded edge on each corner, glue in place.
Sewing Directions: (add batting and backing before sewing diagonals)
Place batting or insul-bright on the wrong side of the backing and glue in place. Place on the back side of the folded star pieces making your quilt sandwich.
Starting in a corner, separate the folded piece a tiny bit to sew in between the folds. You want to try and make the sewing invisible, but if you catch a fold, no one will notice. Sew all the way to the other side. Once you get to the center, the folds go the opposite direction and may catch on your foot. Sew slowly. Complete sewing all 8 rows. Trim to the desired shape and bind as usual.
Here is a video for instructions:
https://www.youtube.com/watch?v=KCGJXmimgKs&list=PLzIiohAoBBHXPZuIj2nT0CxoWUuO6PdxM This guy does a great job of showing you how to make this. He is Amish and does not own an iron!
and